Earlier this week I had to go to the hospital to have an x-ray on my knee. The gift shop was on the way out so I hobbled in for a look. I was so glad I did because there were a lot of cute and unique items in the store. One grouping of ornaments inspired me to want to give to a friend. I liked the idea of the ornaments but couldn’t find one that was perfect for her. So I just decided to go home and make my own!
 I ran (ha – I wish) to Hobby Lobby and picked up a paper mache star ornament, a few coordinating scrapbook pages, a bag of beads, and a charm. Everything was on sale for half-off except the star ornament.
I had on hand a bottle of Mod Podge, super fine iridescent glitter, and silver string. I bought the Mod Podge and glitter for the cute ghost projects that were going around the blogosphere but I never got a chance to do the project. Can I get a witness?
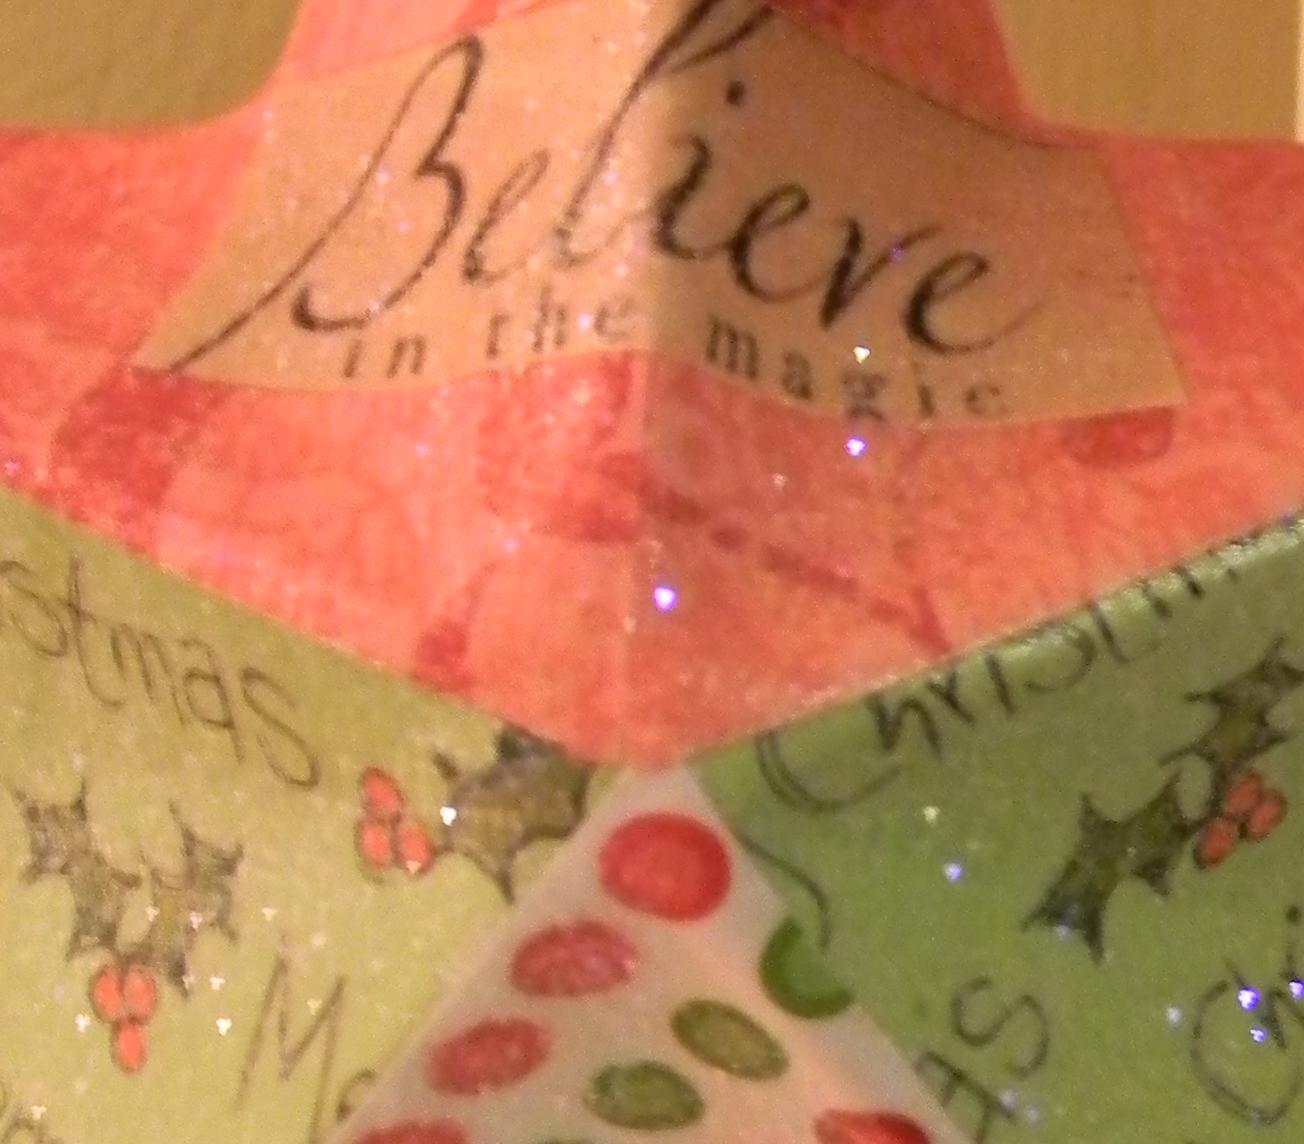 I carefully cut and covered the star form with the papers. To personalize the ornament I printed off “Believe in the Magic” from her blog and added to the star. Once it was good and dry, I did two coats of Mod Podge to seal it all up. On the last coat I sprinkled on the glitter just to add a little extra magic.
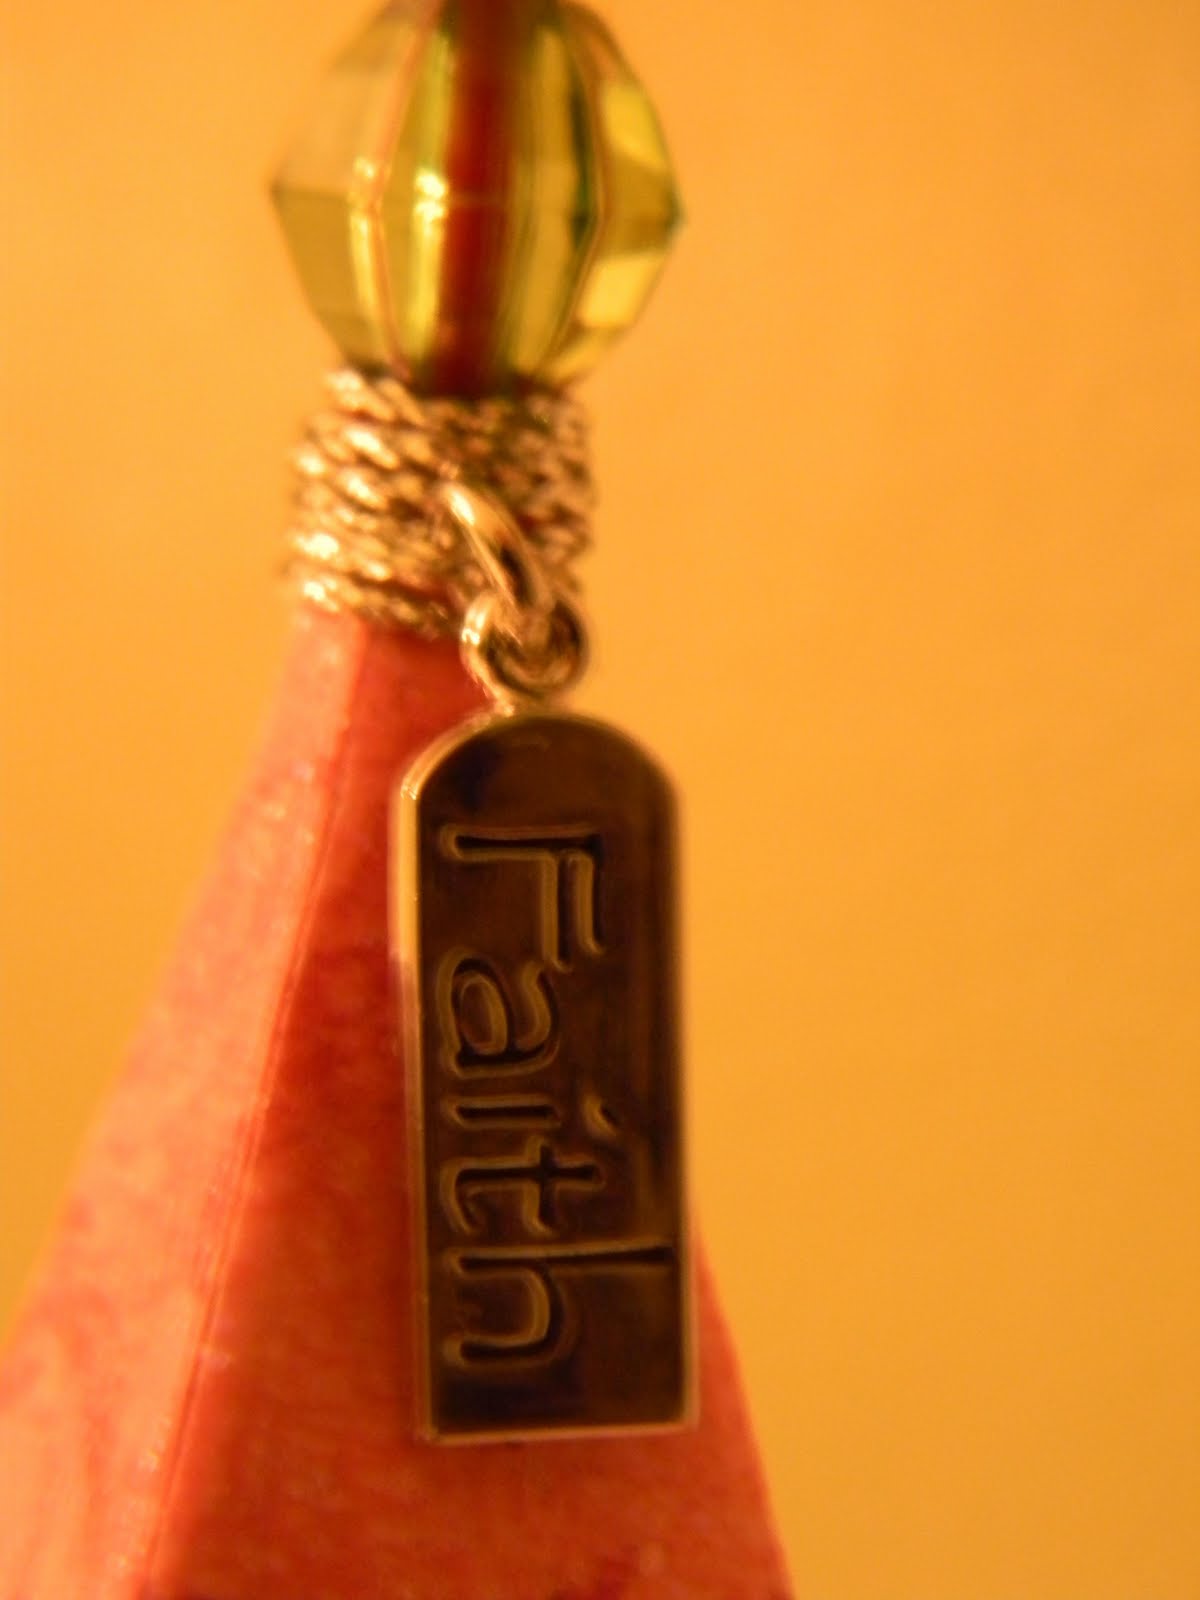 I slid a bead down over a loop of ribbon and stuffed the ends into the top of the star. I added a bead of glue to secure the ribbon. Then I strung the charm on the silver string, wrapped and glued to finish off the top.
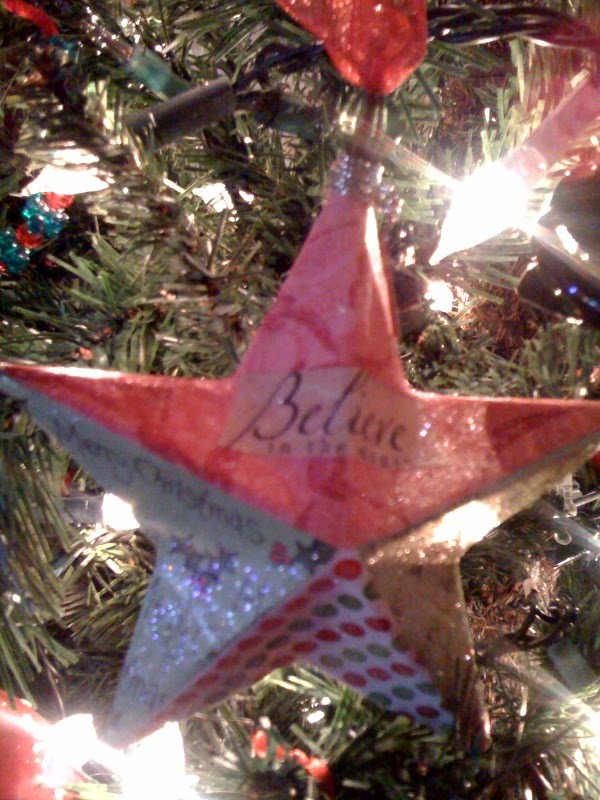 I think it turned out darling especially for a spur of the moment inspiration. I spent less than the actual ornament that inspired me, I have materials to make more, and I like this one even more! It was a joy to craft and even more joyful to see her reaction to it! Here’s a picture of it on her tree from her sweet blog post.
Here are a few more handmade ornament ideas – especially fun for the kiddos!
Have you handmade and given anything with love this month? Tell me all about it!
~Southern Fried Gal
Sharing this post at…


December 16, 2010
I love this! I’ll be sure to read your friend’s post about it, too.
I’ve given out most of the washer ornaments that I made and my friends loved them.
December 16, 2010
Oh I love this!
December 17, 2010
How pretty! I love the little extras you put on it.
I made a star ornament, too, but it’s not as sparkly as yours! Here’s the post if you’d like to see it.
December 20, 2010
I think it’s GORGEOUS!!!
You did some super details cutting too…I never get straight lines! Even with a cutting board…how is that possible. LOL
November 28, 2012
Terrific ornament! Share your ornament (or more) on our Linky List to get exposure for your own blog and share with your community. http://muddymonkeys.me/2012/11/28/wanted-homemade-christmas-ornaments-for-children-and-kids/